Building Professional Web Hosting Solution
<< Linux Basic Setup and Configuration Course
>> Configuring SSH-Key Based Authentication Section
- Understanding SSH-Keys Based Authentication
- Creating SSH-Keys using Putty Keys Generator
- Creating Public VPS Droplet using DigitalOcean
- Managing Linux VPS Instance via Putty SSH Client
- Managing Linux VPS Instance via WinSCP Client
- Creating SSH-Keys using Terminal Keys Generator
- Switching SSH Password to SSH-Keys Authentication
- Uploading Admins and Friends SSH-Keys to VPS
- Uploading SSH Public Keys using VPS Panel
- SSH Hopping using SSH Agent Forwarding
- Deploying Public VPS instance using Vultr Provider
- Securing and Hardening SSH Server Configuration
- SSH Server and Client Most Known Error Messages

Look no further, I believe DigitalOcean and Vultr considered the Best VPS Infrastructure Out there. Creating Public VPS Droplet using DigitalOcean will show you step by step how to create a Public VPS using DigitalOcean. DigitalOcean call their VPS instances Droplets and Vultr call them VPS Instance. In the end of the day, VPS instance and Droplet refer to the same thing.
Objectives:
Creating DigitalOcean Droplet Using SSH-Keys
Prerequisites:
A. Basic Debian or Red Hat Linux Knowledge
B. Login to your DigitalOcean VPS Provider Account
Recommendations:
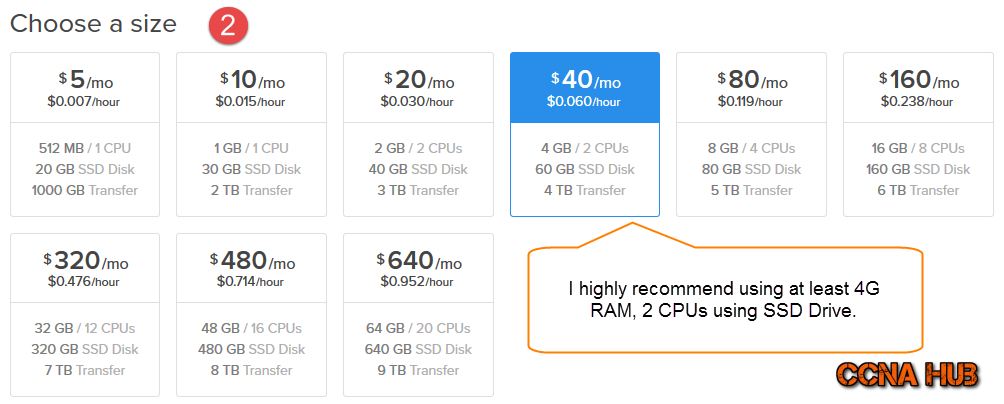
For better performance, use VPS with at least 2 CPUs, 4G Memory, 1G Bandwidth, and SSD Storage drive.
Creating DigitalOcean Droplet Using SSH-Keys
Login to DigitalOcean Control Panel and follow the steps as shown below.
Run the following steps ( 1 to 7)
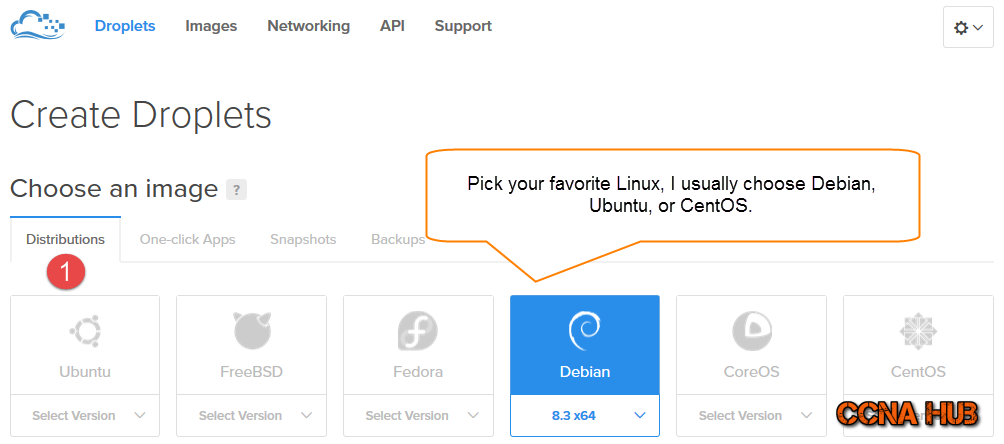
1. Pick Your Favorite Linux Distribution
2. Choose your Droplet Size
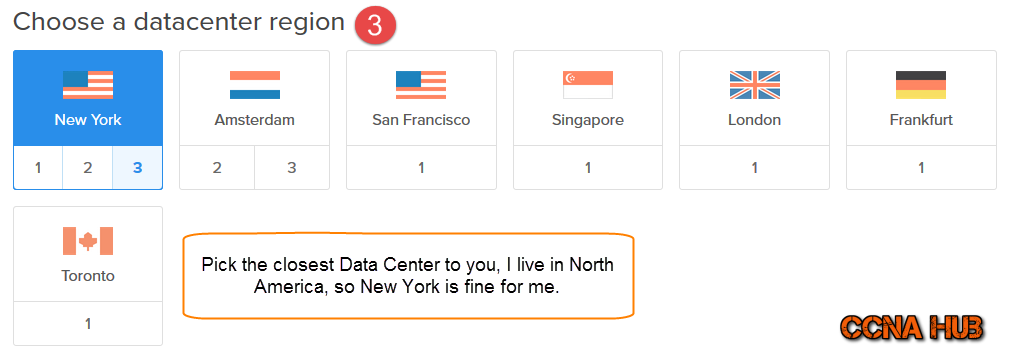
3. Pick the Closest Data Center
4. Final Options Before Creating
I highly recommend to choose all the 3 options and use SSH-Keys as well.
5. Moment of Truth
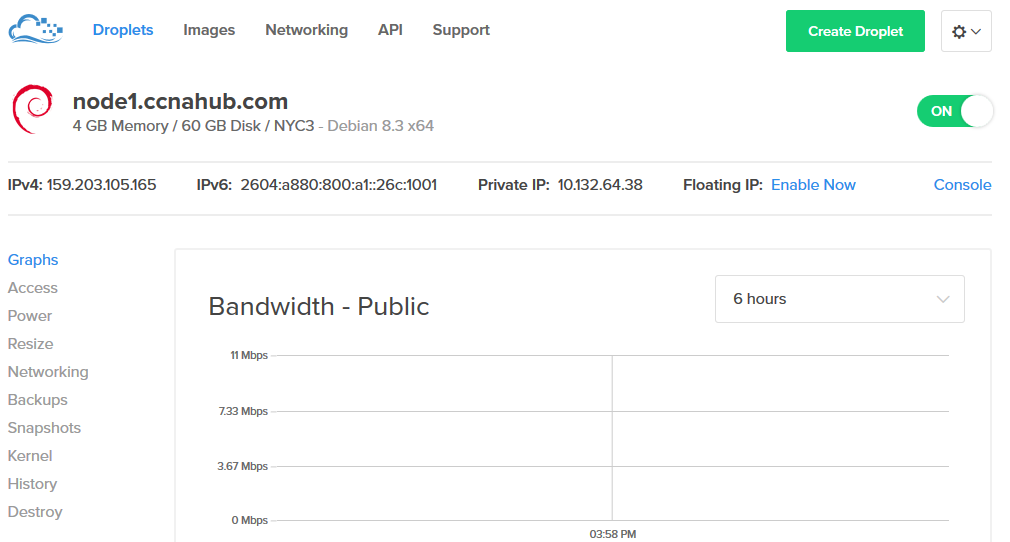
After few seconds, you will have an Active and running Droplet. Notice, that DO won’t send a Temp root password if you choose to create your Droplet using SSH-Keys, however, you have to set a root password regardless since you are going to manage your VPS using the Web Console window as well.
That’s it! You did it my friend, you have created a Linux VPS using DigitalOcean, and you should be able to SSH using the private key of your SSH-keys pair via SSH Clients such Putty and WinSCP.
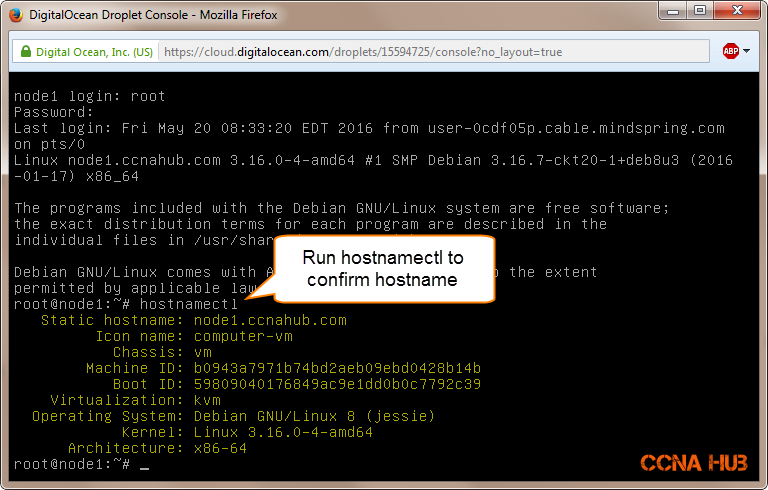
7. Initial Web Console Login
Although you have created your VPS using SSH-Keys, making sure you can login using the web console using root is crucial to confirm. However, creating DO Droplet using SSH-Keys won’t sent you a temp root password, neither there is a way to change it at the Control Panel unless you reset root password using Managing Linux VPS Instance via Putty SSH Client. I will show you how to reset root password to make sure you can login to your VPS using Web Console.
Subject Related
By Wikipedia KVM | KVM vs. Xen | Proxmox
Building Professional Web Hosting Solution
<< Linux Basic Setup and Configuration Course
>> Configuring SSH-Key Based Authentication Section
- Understanding SSH-Keys Based Authentication
- Creating SSH-Keys using Putty Keys Generator
- Creating Public VPS Droplet using DigitalOcean
- Managing Linux VPS Instance via Putty SSH Client
- Managing Linux VPS Instance via WinSCP Client
- Creating SSH-Keys using Terminal Keys Generator
- Switching SSH Password to SSH-Keys Authentication
- Uploading Admins and Friends SSH-Keys to VPS
- Uploading SSH Public Keys using VPS Panel
- SSH Hopping using SSH Agent Forwarding
- Deploying Public VPS instance using Vultr Provider
- Securing and Hardening SSH Server Configuration
- SSH Server and Client Most Known Error Messages


LEAVE A COMMENT