Building Professional Web Hosting Solution
<< Linux Basic Setup and Configuration Course
>> Configuring SSH-Key Based Authentication Section
- Understanding SSH-Keys Based Authentication
- Creating SSH-Keys using Putty Keys Generator
- Creating Public VPS Droplet using DigitalOcean
- Managing Linux VPS Instance via Putty SSH Client
- Managing Linux VPS Instance via WinSCP Client
- Creating SSH-Keys using Terminal Keys Generator
- Switching SSH Password to SSH-Keys Authentication
- Uploading Admins and Friends SSH-Keys to VPS
- Uploading SSH Public Keys using VPS Panel
- SSH Hopping using SSH Agent Forwarding
- Deploying Public VPS instance using Vultr Provider
- Securing and Hardening SSH Server Configuration
- SSH Server and Client Most Known Error Messages

Deploying Public VPS Instance using Vultr Provider will show you step by step how to deploy a reliable, Fast, single Public VPS using Vultr VPS Provider. Vultr got it’s own touch, I liked their clean cut interface, you can upload your own ISO file to install your favorite Linux or Window distribution, you have the option to host your website on dedicated structure over Shared VPS structure, and my favorite feature is Distributed Denial of Server Protection (DDoS).
Objectives:
Deploying Vultr VPS Instance Using SSH-Keys
Prerequisites:
A. Basic Debian or Red Hat Linux Knowledge
B. Login to your Vultr VPS Provider Account
Recommendations:
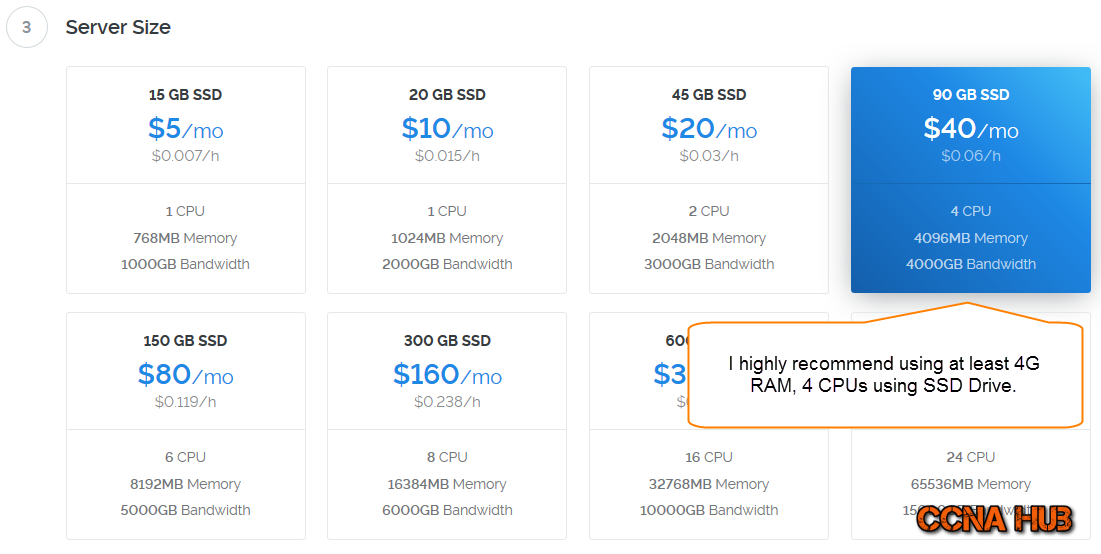
For better performance, use VPS with at least 2 CPUs, 4G Memory, 1G Bandwidth, and SSD Storage drive.
Deploying Vultr VPS Instance Using SSH-Keys
Login to Vultr Control Panel and follow the steps as shown below.
Run the following steps ( 1 to 8)
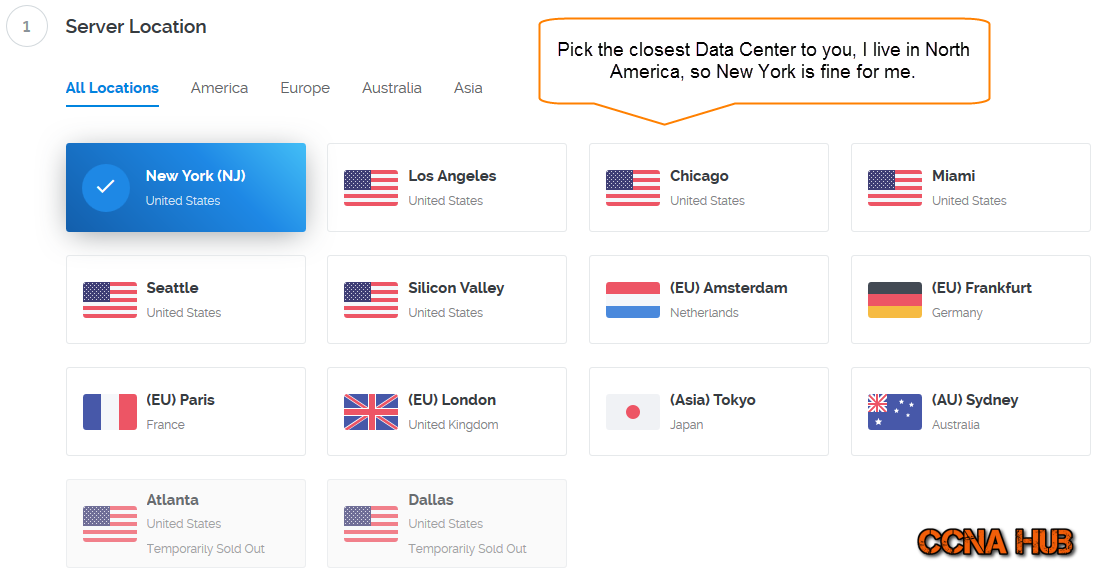
1. Pick the Closest Data Center
2. Pick Your Favorite Linux Distribution
3. Choose your Droplet Size
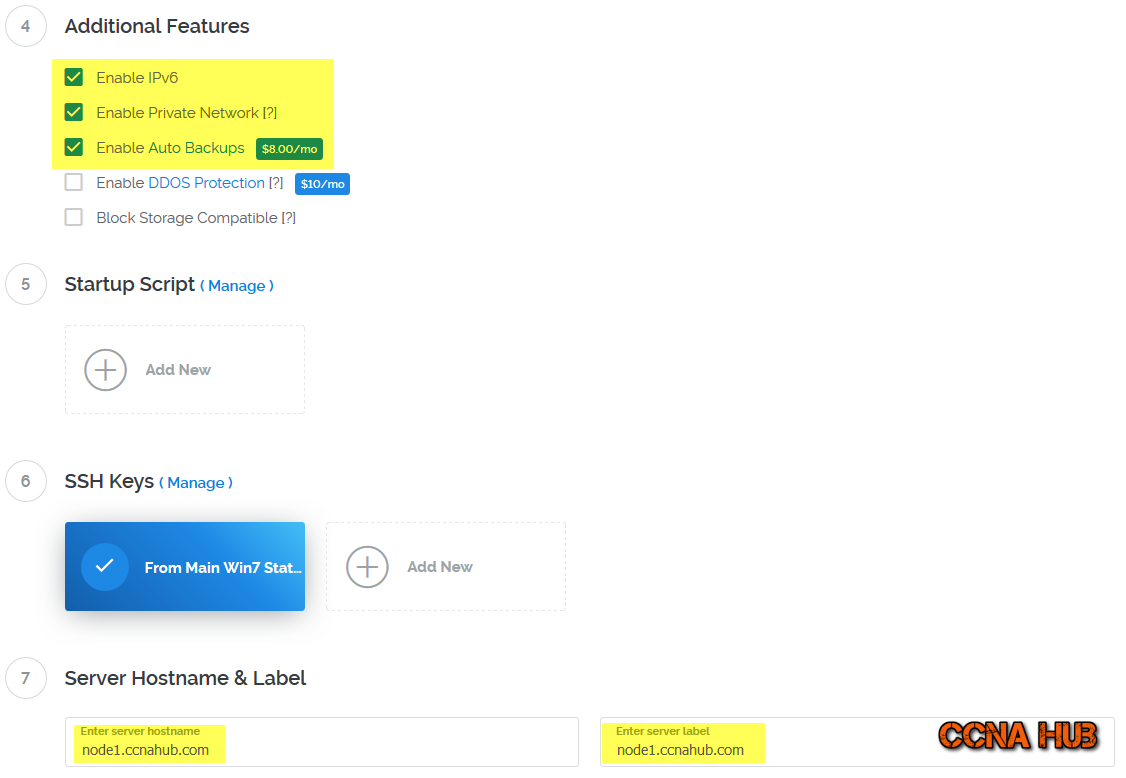
4. Final Features Before Deploying
Although Internet2 (IPv6) is not widely implemented around the world, yet you should be prepared for the transition from IPv4 to IPv6 internet.
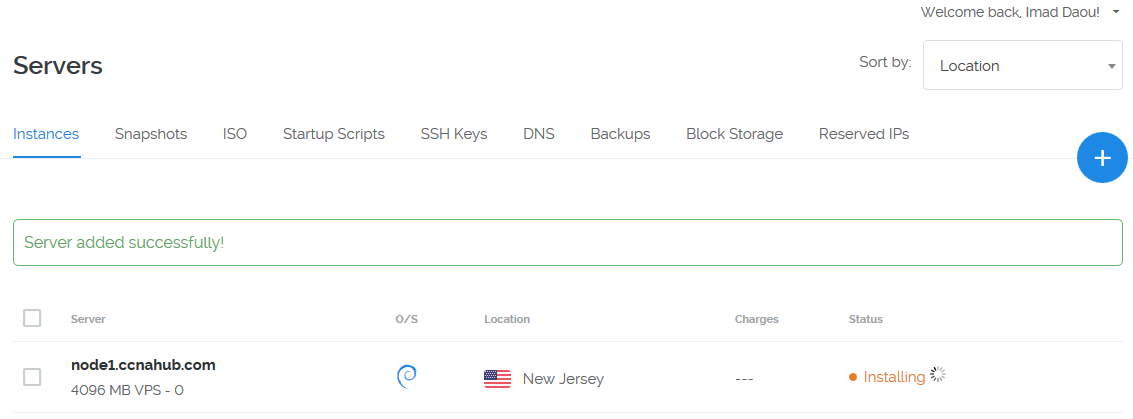
5. Moment of Truth
Please wait few seconds…
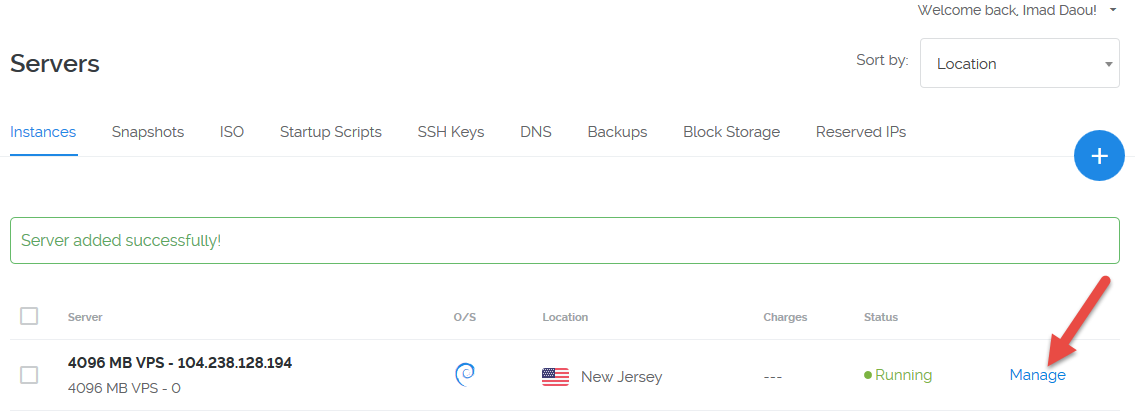
6. Manage VPS Options
Once deplotment is done, you should be able to see your VPS instance running as shown below. Click Manage to View VPS Options.
7. Initial VPS Configuration
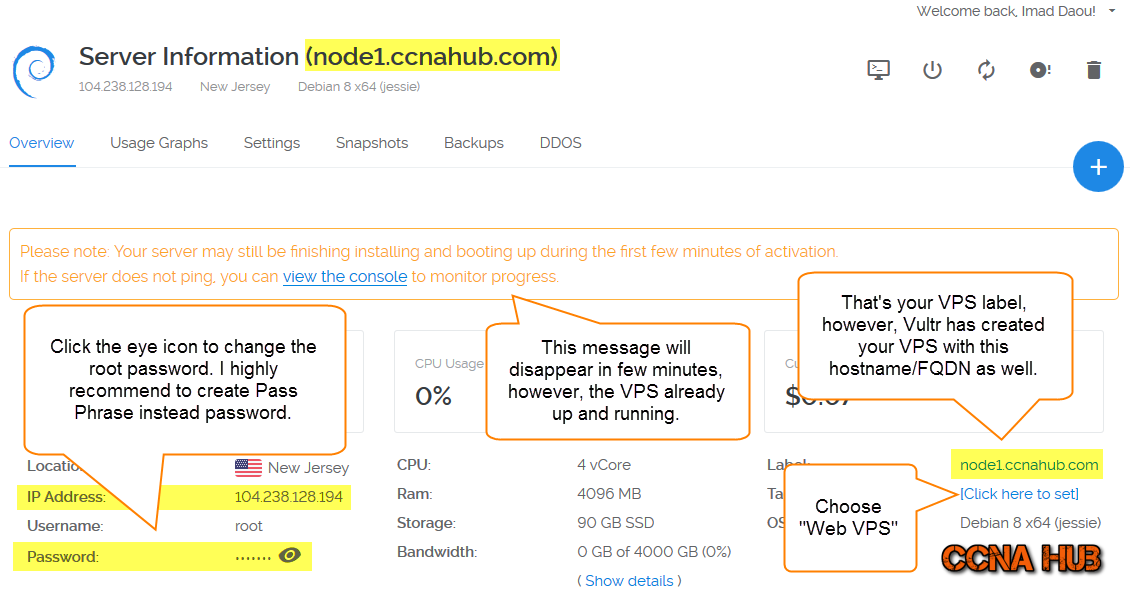 That’s it! You should be ready for the Next Lab.
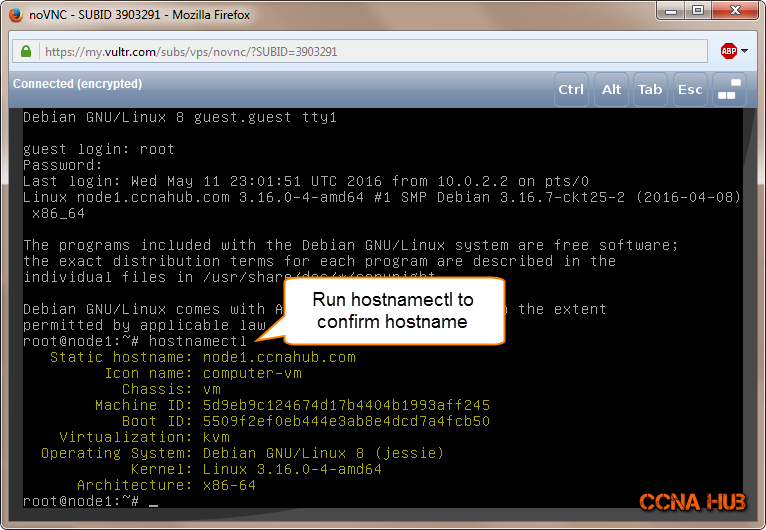
8. Initial Web Console Login
Although you have deployed your VPS using SSH-Keys, making sure you can login using the web console using root is crucial to confirm. You have should have changed the root password in the previous step.
Subject Related
By Wikipedia KVM | KVM vs. Xen | Proxmox
Building Professional Web Hosting Solution
<< Linux Basic Setup and Configuration Course
>> Configuring SSH-Key Based Authentication Section
- Understanding SSH-Keys Based Authentication
- Creating SSH-Keys using Putty Keys Generator
- Creating Public VPS Droplet using DigitalOcean
- Managing Linux VPS Instance via Putty SSH Client
- Managing Linux VPS Instance via WinSCP Client
- Creating SSH-Keys using Terminal Keys Generator
- Switching SSH Password to SSH-Keys Authentication
- Uploading Admins and Friends SSH-Keys to VPS
- Uploading SSH Public Keys using VPS Panel
- SSH Hopping using SSH Agent Forwarding
- Deploying Public VPS instance using Vultr Provider
- Securing and Hardening SSH Server Configuration
- SSH Server and Client Most Known Error Messages



LEAVE A COMMENT